Greg Moreton was the demonstrator for our May meeting. He has been with us a couple of times and his style used to be large lumps of monkey puzzle tree.
His style now is quite the opposite and is now quite delicate items for “looking at” Not much good for anything else.
His first project of the day was a natural edge yew vase with a lid. He mounted a small log between centres and turned from each end leaving the bark roughly at the centre and turned a chucking spigot at each end.
He parted through to one side of the bark, one piece for the vase and the piece without bark for the lid.
He turned the lid first ending by drilling a small hole through to take a finial. Then he mounted the other piece and hollowed it out leaving a thin wall and a recess to take the lid. He then finished the final shape for the outside and parted it off.
Next came the finial which he made from a piece of padauk that he had in his box. He would normally prefer to use ebony for this. First he turned a stud with a small spigot which was glued on the inside of the lid and then the finial with an equally small spigot that was glued on the top. And there you have it. A natural edged vase with an inset lid.
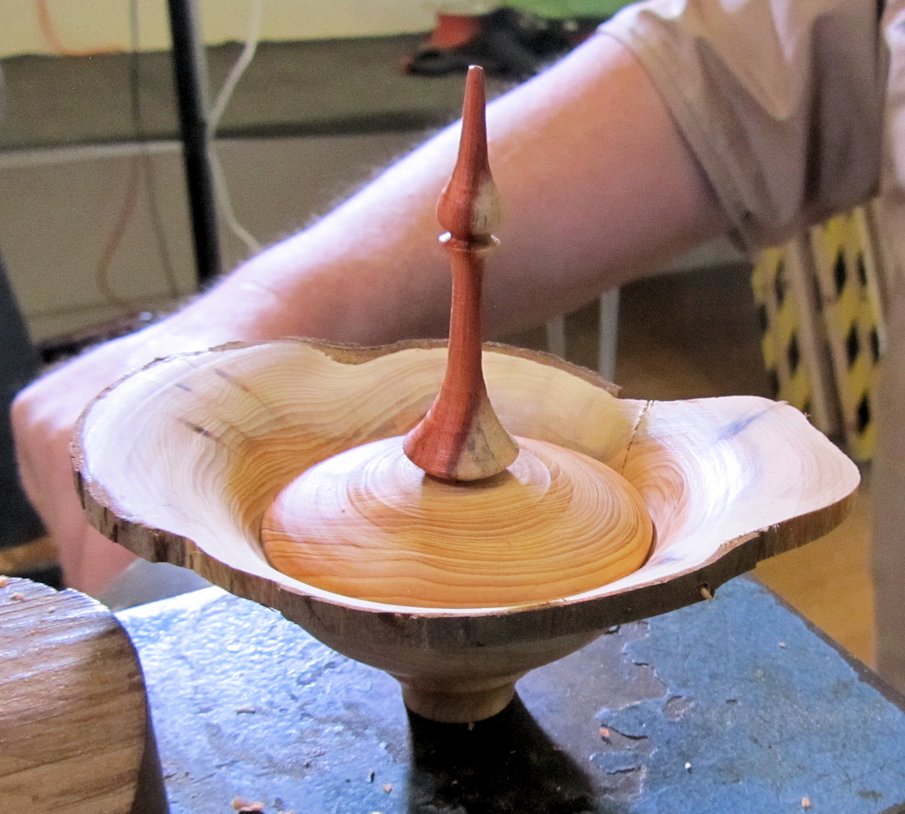
Greg’s next piece was something “that has absolutely no use at all”. Fred came up with a lovely description that Greg said he would try and remember which was “something to enhance your living environment”. Quite a challenge to turn the last cuts.
Greg started with another log and using an auger mounted in the lathe he drilled right the way through using the tailstock to push the log on to the auger. Then he mounted the log between a revolving centre at the tailstock and a short jam chuck spindle he turned to be a firm fit in the hole He turned away the centre leaving natural edges at either end and a spigot at the end nearest the chuck to mount it on in order to hollow it out.
He removed it from the centres and mounted it in the chuck on the spigot and very carefully hollowed it out forming a vase shape following the wall created when shaping the outside and going in to meet the chucking spigot.
Greg wasn’t wasting time showing us how to sand but this is the point when you finish this end. He removed it from the chucking spigot and reversed it on to the chuck using a jam chuck and after centering it using the tail stock he securely taped it to the chuck to prevent it flying off in to the midst of us unsuspecting voyeurs while he gingerly hollowed out the other end. And this is what we ended up with.
Greg chose a log of robinia to make his next piece which was to be a “Wobbly bowl” “Not everything has to have a practical use. It can be purely for decoration, a work of art” said Greg and a wobbly bowl is just that. It doesn’t have a flat base to stand on.
He mounted it between centres and turned the outside to his desired shape leaving a chucking spigot at one end. He reversed it on to the spigot and hollowed it out leaving a natural rim and a thin wall. He took it off the chuck and reversed it on to a foam faced jam chuck and brought the tail stock up to support it while he finally finished the bottom to a perfect round and taking the spigot down really small so that it can be easily snapped off and the remaining pip sanded off.
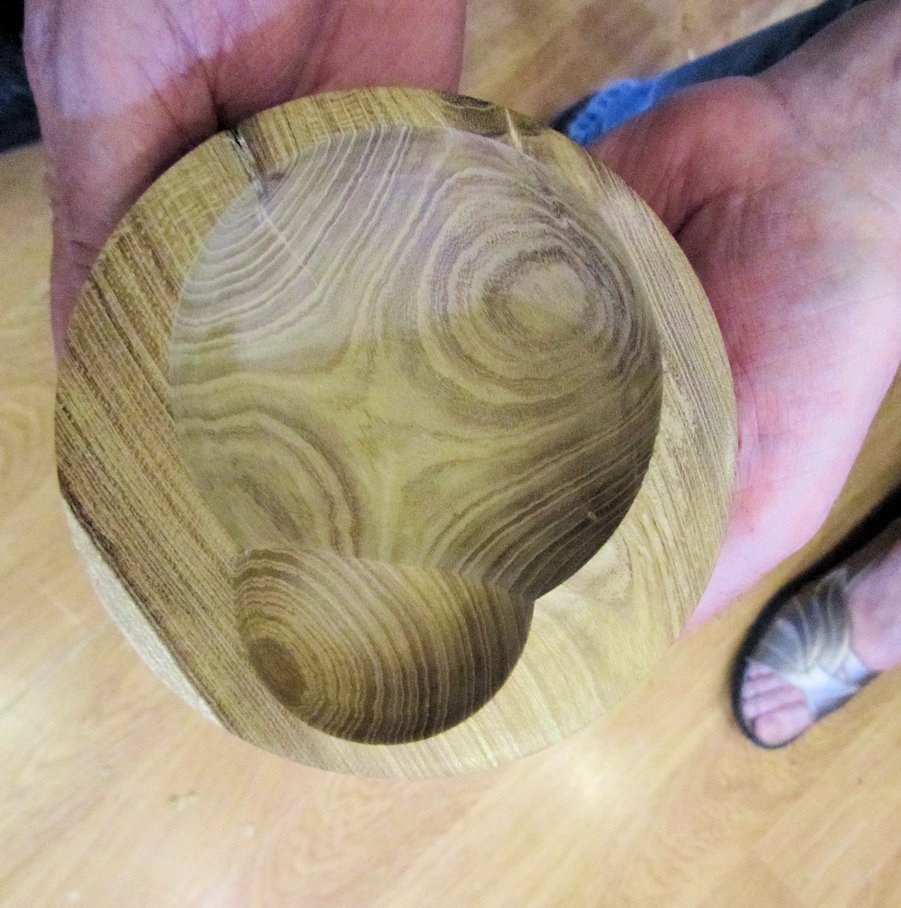
Ok. For his last piece of the day Greg turned his oyster bowl. A flat faced bowl with two recesses in it. He mounted his log on to a screw chuck and turned the outside to a nice round base, (or should that be bottom?) and faced off down the chuck side as far as the screw chuck. Then he took it off and set up his holding jig on the lathe.
Before mounting the
bowl he marked out the centre of the two recesses he was going to create by using two discs which he placed on the flat side of the bowl, overlapping them to give two off set centres.
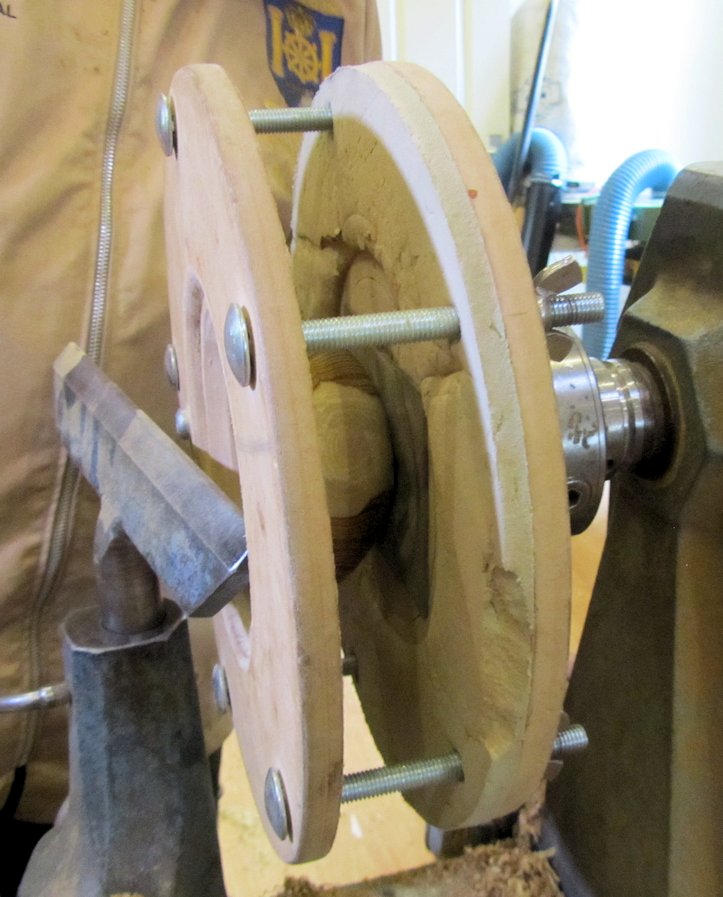
This is Greg’s jig.
Two MDF discs. The rear one has a thick foam covering and the front one has a hole turned in it to allow the piece being held to be hollowed out.
Greg chose to hollow the smaller recess first and slid the bowl between the discs and lined up the centre using the tailstock centre then locked up the coach screws to keep it in place. Once this one was hollowed out to the depth and diameter he required he slackened the bolts and moved the bowl to the centre of the second recess and re-tightened them and hollowed out the second recess. He removed it from the jig and there you have it. One oyster bowl.
With a few minutes to spare Greg turned a ball to fit the small recess to be the pearl.
Sorry, no pics but basically he turned a cylinder from a small log and then trimmed the ends to make the length equal to the diameter. Then he took the corners off repeatedly creating facets that slowly took the shape of a sphere.
He then mounted this between two hollowed discs fitted one to the chuck and one made to fit over the revolving centre. (Cup Chucks) Then by following the shadows created when the sphere was spinning he turned them away, rotating it to bring up a new area to work on until he had a near perfect ball.
He gave the finished piece to Sheila because he thought she looked like a lady who would appreciate pearls.
Nice one Greg.
Graham
|